Origami Butterflies
Learn to fold stunning origami butterflies with our easy, step-by-step guide. Perfect for beginning paper folders and crafters alike.
Skills Required: None. This is a great project for beginners. Get a video at the bottom of the post showing all the folds.

Today, we’re going to show you how to make one of the most beautiful creations you can make with just a few folds: origami butterflies. These paper creatures are incredibly fun to make!
Origami isn’t just about paper folding; it’s a calming activity that lets you pour a little bit of your soul into each piece. The butterfly, with its symmetrical beauty and gentle contours, is a perfect project to start with.
In this post, you’ll find easy-to-follow instructions and helpful tips to help you create your very own origami butterfly.

It’s great for beginners, and you can use pretty papers to fold your flying insects. In fact, I recommend you use bright colors and patterns if you’re feeling it!
So, grab your paper and let’s get ready to fold some stunning butterflies that can brighten up any room or serve as a handmade gift to someone special.
Are you ready to embark on this crafty adventure? By the end of this, you’ll not only have a bunch of adorable butterflies but also a new skill that you’ll be eager to show off.

Let’s start folding, and who knows? You might just find yourself completely captivated by the art of origami!
Origami Butterfly
Begin with a 15 cm (6″) square piece of paper (or size of your choice), colored on both sides. The size of the paper square will determine the size of the finished butterfly. Mine is 55 mm tall (a little over 2 1/8″) by 120 mm wide (almost 4 3/4″).
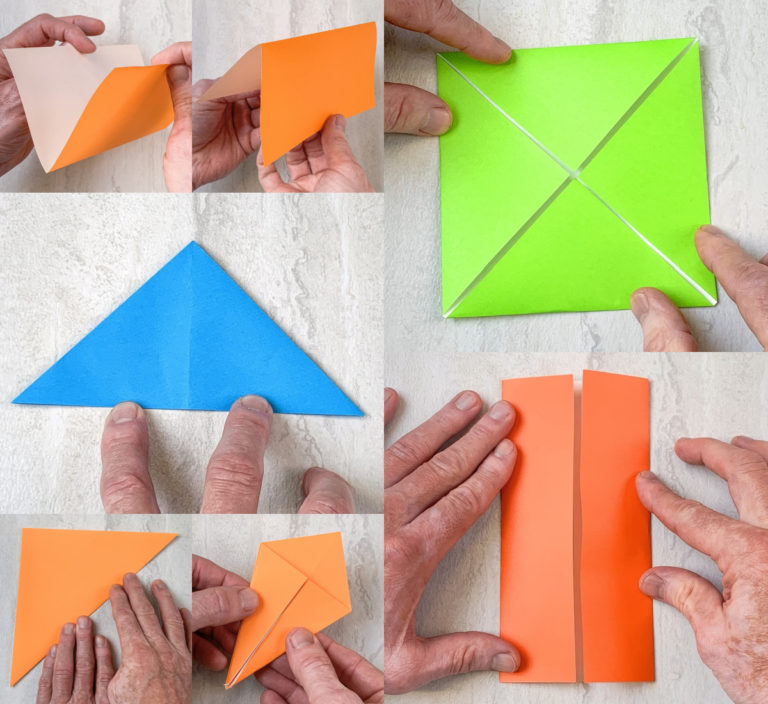
Make the Base Folds
Place your paper on your surface. Fold in half, then rotate a half turn and fold in half again.

Turn the paper a quarter turn and repeat what you did before. Fold in half to create a triangle. Rotate a half turn and fold in half again.

Create the Wings
Fold the paper in half with the fold at the top.

Form the wings by creating triangles on both sides. You’re going to push in the sides as shown below.

Repeat this action on the other side, pushing in the flap and creating another triangle. You will end up with a triangle shape.

Fold this triangle in half and trim with scissors to round the wings.

Form the Body
Fold up one paper flap on both sides to meet the center line.

Turn the triangle over and fold the point down a little bit past the base. Crease with your fingers.

Flip over and fold the tip down to secure the paper.

Fold the wings in half and crease to make a butterfly!

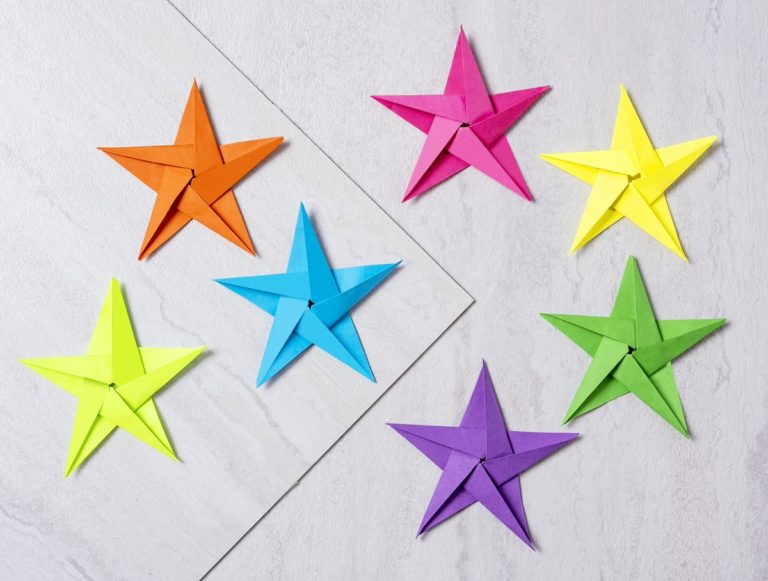
Now go ahead and make a bunch of these. They look great with patterned paper too.

Are you ready for the video? Learn how to make an origami butterfly below! Then let me know what you think in the comments!